FreeQAs
 Request Exam  Contact
  • Home
  • View All Exams
  • New QA's
  • Upload
PRACTICE EXAMS:
  • Oracle
  • Fortinet
  • Juniper
  • Microsoft
  • Cisco
  • Citrix
  • CompTIA
  • VMware
  • SAP
  • EMC
  • PMI
  • HP
  • Salesforce
  • Other
  • Oracle
    Oracle
  • Fortinet
    Fortinet
  • Juniper
    Juniper
  • Microsoft
    Microsoft
  • Cisco
    Cisco
  • Citrix
    Citrix
  • CompTIA
    CompTIA
  • VMware
    VMware
  • SAP
    SAP
  • EMC
    EMC
  • PMI
    PMI
  • HP
    HP
  • Salesforce
    Salesforce
  1. Home
  2. EMC Certification
  3. D-VPX-DY-A-24 Exam
  4. EMC.D-VPX-DY-A-24.v2025-03-20.q22 Dumps
  • «
  • 1
  • 2
  • 3
  • 4
  • 5
  • 6
  • »
Download Now

Question 1

A customer engineer has installed VS2 VPLEX hardware, assigned IPs, and made the VPLEX ready to be configured. Which interface and port should be used to ssh to when using the EZ Setup wizard?

Correct Answer: D
When using the EZ Setup wizard for VPLEX, the correct interface and port to SSH into is the Management Server's eth1 interface. This is typically the interface configured for management access and is used during the initial setup process.
* Management Server Access: The Management Server is the primary interface for managing and configuring the VPLEX system. It is through this server that the EZ Setup wizard is accessed1.
* eth1 Interface: The eth1 interface on the Management Server is usually dedicated to management traffic. This interface is configured with an IP address that allows SSH access for configuration purposes1.
* EZ Setup Wizard: The EZ Setup wizard is a guided setup tool that simplifies the initial configuration of the VPLEX system. It prompts the user for necessary information to configure the system1.
* SSH Protocol: Secure Shell (SSH) is a network protocol used to securely access network services over an unsecured network. When configuring VPLEX, SSH is used to connect to the Management Server and run the EZ Setup wizard1.
* Configuration Steps: To SSH into the Management Server, the customer engineer would use an SSH client, input the IP address assigned to the eth1 interface, and connect using the appropriate credentials provided during the VPLEX installation1.
In summary, to use the EZ Setup wizard for configuring VPLEX, the customer engineer should SSH into the Management Server using the eth1 interface. This interface is set up during the initial installation and is used for management access to the system.
insert code

Question 2

A storage administrator has just been informed by their network team that a WAN outage has been restored.
How can the administrator verify that their VPLEX Metro WAN COM link is restored?

Correct Answer: D
To verify that the VPLEX Metro WAN COM link is restored, the storage administrator should run the connectivity validate-local-com command. This command checks the connectivity status of the local communication links within the VPLEX cluster.
* Command Execution: The administrator should access the VPLEX CLI and execute the connectivity validate-local-com command. This will initiate a check of the local COM ports' connectivity status1.
* Interpreting Results: After running the command, the administrator should review the output to verify that all expected connectivity is present. The output will indicate whether each local COM port is communicating as expected1.
* WAN COM Link: The WAN COM link is responsible for the communication between VPLEX clusters over a wide area network. Ensuring that the local COM links are operational is a prerequisite for the WAN COM link to function properly1.
* Post-Outage Verification: Following a WAN outage, it's crucial to confirm that the communication links are fully operational to maintain the high availability and data mobility features of VPLEX Metro1.
* Best Practices: It is recommended to follow the Dell EMC VPLEX best practices for post-outage recovery, which include running the connectivity validate-local-com command to ensure that the system is ready to resume normal operations1.
In summary, the connectivity validate-local-com command is the correct procedure to verify that the VPLEX Metro WAN COM link is restored, as it checks and confirms the presence of all expected local communication link connectivity within the VPLEX cluster.
insert code

Question 3

A VPLEX Metro cluster is being installed for a company that is planning to create distributed volumes with
200 TB of storage. Based on this requirement, and consistent with
EMC best practices, what should be the minimum size for logging volumes at each cluster?

Correct Answer: A
When configuring a VPLEX Metro cluster, especially for a company planning to create distributed volumes with a large amount of storage like 200 TB, it is essential to adhere to EMC best practices for the size of logging volumes.
* Purpose of Logging Volumes: Logging volumes in VPLEX are used to store write logs that ensure data integrity and consistency across distributed volumes. These logs play a critical role during recovery processes1.
* Size Considerations: The size of the logging volumes should be proportional to the amount of active data being written to ensure that all write operations are captured in the logs. For 200 TB of distributed storage, a minimum size of 10 GB for each logging volume is recommended to handle the logging requirements1.
* Configuration: The logging volumes should be configured on each cluster to provide redundancy and high availability. This means that both clusters in a VPLEX Metro configuration should have logging volumes of at least the minimum recommended size1.
* Best Practices: EMC best practices suggest that the logging volume should be sized appropriately to support the operational workload and to ensure that there is sufficient space to capture all write operations without any loss of data1.
* Verification and Monitoring: After setting up the logging volumes, it is important to monitor their utilization to ensure they are functioning correctly and to adjust their size if necessary based on the actual workload1.
In summary, consistent with EMC best practices, the minimum size for logging volumes at each cluster in a VPLEX Metro cluster being installed for creating distributed volumes with 200 TB of storage should be 10 GB. This size ensures that the logging volumes can adequately support the write logging requirements for the amount of storage being used.
insert code

Question 4

A RAID-C device has been built from a 100 GB extent and a 30 GB extent. How can this device be expanded?

Correct Answer: D
To expand a RAID-C device that has been built from extents of unequal sizes, such as a 100 GB extent and a
30 GB extent, concatenation can be used. Concatenation allows for the addition of another extent to the existing RAID-C device, thereby increasing its overall size.
* Understanding RAID-C: RAID-C is a type of RAID configuration used in VPLEX that allows for concatenation, which is the process of linking multiple storage extents to create a larger logical unit1.
* Adding an Extent: To expand the RAID-C device, a new extent of the desired size can be added to the existing device. This new extent is concatenated to the end of the current extents, increasing the total capacity of the RAID-C device1.
* VPLEX CLI Commands: The expansion is performed using VPLEX CLI commands. The specific command to add an extent to a RAID-C device would be similar to the storage-volume expand command, which instructs the system to include the new extent in the RAID-C device1.
* Resizing Back-End Storage: If necessary, the back-end storage volumes (the physical storage on the array) that correspond to the extents may need to be resized to match the new configuration1.
* Verification: After the expansion, it's important to verify that the RAID-C device reflects the new size and that all extents are properly concatenated and functioning as expected1.
In summary, a RAID-C device built from extents of unequal sizes can be expanded by using concatenation to add another extent to the device. This method allows for flexibility in managing storage capacity within a VPLEX environment.
insert code

Question 5

What is the correct order of steps to create and operate a custom monitor?

Correct Answer:

Explanation:


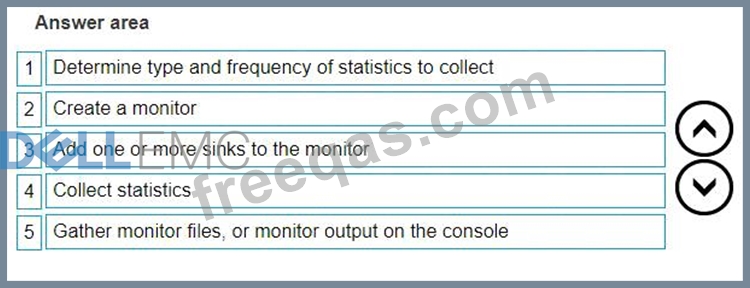
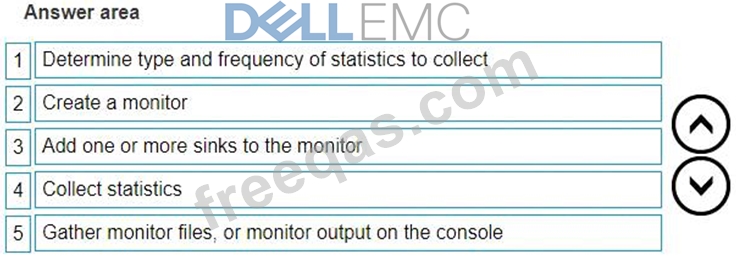
The correct order of steps to create and operate a custom monitor is:
* Determine the type and frequency of statistics to collect.
* Create a monitor.
* Add one or more sinks to the monitor.
* Collect statistics.
* Gather monitoring files, or monitor output from the console.
To create and operate a custom monitor within the Dell VPLEX environment, follow these steps:
* Determine the Type and Frequency of Statistics to Collect: Identify what statistics are relevant for your monitoring purposes and how frequently they should be collected. This will depend on the specific needs of your environment and the performance metrics you wish to track.
* Create a Monitor: Using the VPLEX CLI or Unisphere for VPLEX, create a new monitor instance.
Configure the monitor with the types of statistics you determined in the previous step.
* Add One or More Sinks to the Monitor: Sinks are the destinations where the collected statistics will be sent. These could be files, databases, or external systems. Set up one or more sinks in the monitor configuration to ensure that the data is stored or transmitted as needed.
* Collect Statistics: Start the monitor to begin collecting statistics. The monitor will gather data from the VPLEX system according to the type and frequency settings you have specified.
* Gather Monitoring Files, or Monitor Output from the Console: After the statistics have been collected, retrieve the monitoring files from the specified sinks, or view the output directly from the console if real-time monitoring is configured.
These steps are based on the standard procedures for setting up and managing custom monitors in a Dell VPLEX environment, as detailed in the Dell EMC VPLEX documentation. By following these steps, you can effectively monitor the performance and health of your VPLEX system.
insert code
  • «
  • 1
  • 2
  • 3
  • 4
  • 5
  • 6
  • »
[×]

Download PDF File

Enter your email address to download EMC.D-VPX-DY-A-24.v2025-03-20.q22 Dumps

Email:

FreeQAs

Our website provides the Largest and the most Latest vendors Certification Exam materials around the world.

Using dumps we provide to Pass the Exam, we has the Valid Dumps with passing guranteed just which you need.

  • DMCA
  • About
  • Contact Us
  • Privacy Policy
  • Terms & Conditions
©2025 FreeQAs

www.freeqas.com materials do not contain actual questions and answers from Cisco's certification exams.